Time to prepare those cricket pitches

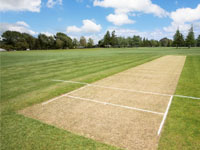
 It probably does not seem like it yet, judging by the weather, but it is definitely time to begin preparing school cricket pitches for summer.
Given a number of the national team’s recent results, it is to be hoped there has not been too much loss of enthusiasm among our budding future representatives, but if that hasn’t put them off, a hard, leather cricket ball rearing from a good length and flying past their noses, almost certainly will.
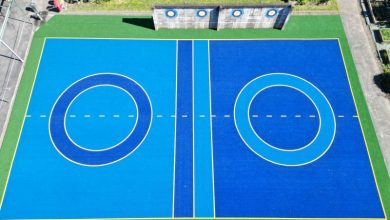
Few sports are as demanding in terms of preparation as cricket where long hours have to be spent preparing the pitch after a winter, when many games of rugby or football are likely to have been played over it, and a true surface needs to somehow miraculously emerge from the cratered results. While many schools have synthetic practice pitches these days, only a turf wicket can give the real cricket characteristics of cut, spin and bounce. And given the volatility of the New Zealand summer, obtaining good results can be difficult to achieve.
Fortunately, New Zealand Cricket has provided all the necessary information in an online form by Karl Johnson, former turf manager for New Zealand Cricket, with assistance from Ces Renwick and Stuart Cameron-Lee.
Extensive guidelines
However, while the guidelines are set out clearly, preparing cricket pitches is not something to take on lightly. Schools lucky enough to have an enthusiast on-staff on or on-tap to take full responsibility should be very grateful. For example, under Johnson’s guidelines on Spring Renovation comes:
1. Ensure winter or early spring rolling has achieved adequate base compaction and the pitch feels firm to walk on. To check compaction take a 100mm core and inspect to make sure a good firm base – 50–100mm area is present. If this is not present, roll with a fairly heavy roller when the top is dry. Check core again
2. If exposed to winter sport, the cutting height should be gradually reduced to 12-15mm. This will assist sunlight penetration and surface drying and reduce the tuftiness of grass plants
3. Immediately prior to spring renovation, the grass height should be reduced to 10mm
4. A groover with 1.5mm wide verticutting blades placed 12mm apart should be set up so that the blades are just touching and breaking the soil surface. Verticutting should proceed in more than one direction and be sufficient to create a clean soil surface for the binding of topdressing soil. While reducing turf density through the removal of dead fibrous material at the soil surface, verticutting should not remove the existing grass cover
5. Prior to topdressing a rotary mower can be used to suck up all loose plant material and organic matter leaving a clean surface upon which to add soil 6. Topdressing soil (aggregates less than 4mm diameter) may then be added at a rate of 1kg/sq.m and worked into the existing soil along with superphosphate (30g/m sq.). Care must be taken to ensure a ‘cake layer’ of old and new soil does not result. This often develops through insufficient grooving
7. Establish surface levels adding soil as required. It is important to work this soil well into the existing soil and grass cover. Verticutting should knock off high spots. Try not to rely on topdressing after grass establishment to rectify smoothness and level problems. Great care should be taken at this stage to ensure that an even surface with no undulations is achieved
8. Seed with turf type ryegrass eg. Allstar (20/1m sq.) and groove and rake in well. The seed should be applied before the soil is put on
9. Recheck surface levels
10. To assist existing grass apply urea at 2kg/75 sq. m
11. Cover with shade cloth to slow surface drying and accelerate seed germination. Prevention of rapid surface soil drying is particularly important for germination of coated seed (frequent light irrigation may also be required)
12. Shade cloth should be removed soon after seed germination and left in place no longer than 7 days or turf may be weakened.
Help at hand
Unfortunately, there is a great deal more on what should be done at other times of the year and several pages devoted to the intricacies of effective pitch rolling alone.
More fortunately, the booklet also provides a number of emergency advisers who schools can call on if necessary. And New Zealand Cricket does recognise that it may all get too much, and provides similar support for those installing all-weather surfaces.
However – let’s face it – there is nothing quite like the satisfaction of producing a superb example of the real thing.
By Brent Leslie


